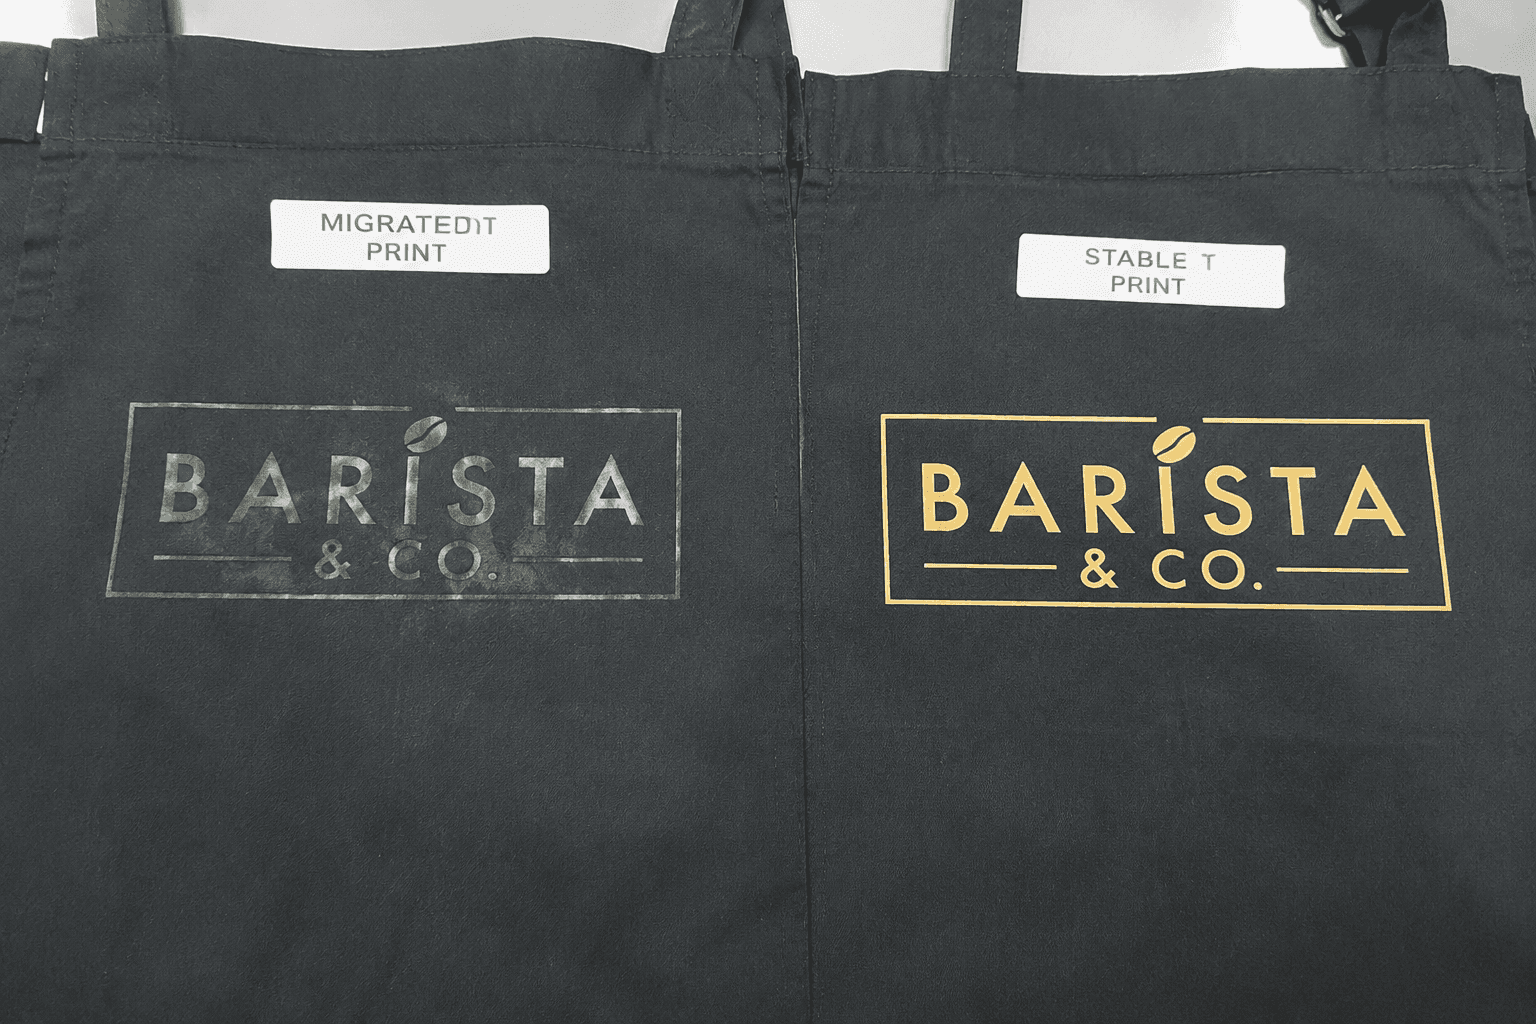
When buyers report apron logo cracking after wash, the crack usually appears late in the process, not at the true point of failure. In custom apron production, the first breakdown is typically one of four controllable variables: a transfer film too rigid for a 240-300 GSM canvas bib, a screen print that looked dry but never fully cured through the ink film, a stain-release or water-repellent finish that reduced adhesion, or a purchase order that never defined a commercial wash standard. The sourcing task is to identify which variable failed first, on which apron construction, and after how many verified wash cycles.
Aprons face a harsher duty cycle than most decorated garments. Restaurant, bakery, butcher, café and hotel aprons are bent at the chest, rubbed against counters, splashed with oil and washed with alkaline chemistry. In many uniform programs, commercial washing runs at 40°C, 60°C or 75°C, followed by tumble drying or tunnel finishing. A chest logo that survives 5 home-laundry cycles on a T-shirt can still fail on an apron after 8-15 industrial cycles because the substrate is heavier, the fold line is sharper and the cleaning chemistry is stronger.
That is why professional buyers should treat apron logo cracking after wash as a specification problem, not a vague quality complaint. The order needs written numbers: fabric composition, finished weight in GSM or oz, logo dimensions, placement map, decoration method, cure or press window, required wash count, target AQL and expected cost per piece. Once those figures are built into sampling and bulk approval, most cracking cases can be isolated quickly and corrected before they become a claim, replacement shipment or delayed rollout.
- Most cracking is built in before the first wash; laundering exposes brittle film, weak adhesion or incomplete cure already present in the apron.
- Fabric changes decoration risk; a 7 oz twill bib apron and an 11 oz washed canvas apron should not share one logo method without validation.
- Commercial wash standards belong in the PO; define temperature, detergent type, drying method and the minimum pass level such as 20, 30 or 50 cycles.
- Large solid chest logos carry the highest cracking risk; failure rates rise sharply above 15 x 15 cm and again above 20 x 20 cm on heavy bib aprons.
- A 30-50 piece pilot wash test is cheaper than a bulk claim; adding 3-7 days before production usually costs less than replacing a 3,000-piece shipment.
- Small unit-cost cuts can create large replacement costs; saving $0.04-$0.15 per apron on decoration often creates far higher claim exposure later.
Why apron logo cracking after wash shows up faster in commercial apron programs
Aprons fail differently from T-shirts or tote bags because the logo sits on a work garment that folds and abrades all day. On bib aprons, the chest panel creases whenever staff lean forward, tighten waist ties or wipe hands. On waist aprons, branding near pocket mouths is gripped and flexed repeatedly. On cross-back aprons, the front body twists diagonally during movement, creating stress lines across broad prints. In many cases, washing only reveals a weakness already created in decoration or material selection.
Commercial laundry accelerates that weakness. In a café chain, one apron may be washed 2-4 times per week; in hotel kitchens, bakeries and butcher operations, 4-6 cycles per week is common. That means a logo may reach 20 cycles in one month and 50 cycles within one quarter. A supplier statement such as 'washable logo' is not actionable. Buyers need a written operating standard, for example: 30 commercial cycles at 60°C, alkaline detergent, tumble dry low, no visible cracking from 1 meter, no edge lifting above 2 mm.
Service-life target should drive decoration method and budget. A 1,000-piece seasonal café promotion at FOB $1.90-$2.50 per apron may only require 10-15 wash durability. A 5,000-piece hotel or restaurant uniform order at FOB $4.80-$7.20 per apron usually needs 30-50 washes, tighter process control and stricter QC. The practical sourcing question is not which logo method is cheapest on paper, but which one meets the wash target at the lowest total risk.
- Typical durability targets are 10-15 washes for short-term promotions, 20-30 washes for café and retail uniforms, and 50+ washes for leased or industrial-laundry apron programs.
- Highest-risk logo zones are bib center folds, pocket openings, lower front thigh-crease areas and strap prints on folded tapes.
- The cost gap between a basic transfer and a more durable method is often only $0.05-$0.28 per piece, while a replacement claim on 3,000 aprons can exceed $6,000-$18,000 after freight, credits and rework.
Diagnosing apron logo cracking after wash in heat transfers: film thickness, adhesive and logo placement
When apron logo cracking after wash involves a transfer, the root cause should be reviewed as a full stack rather than a logo-only issue. That stack includes apron fabric, surface finish, dye process, transfer film thickness, adhesive chemistry, press temperature, dwell time, pressure and peel timing. A PU transfer that performs well on a 200 GSM 65/35 twill apron with a 7 x 7 cm left-chest mark can fail quickly on a 280 GSM enzyme-washed cotton canvas apron carrying a 24 x 18 cm solid chest graphic. The method name stays the same, but the flex demand changes materially.
Film thickness is one of the fastest screening points. On aprons, films in the 60-80 micron range usually flex better than decorative films in the 95-110 micron range. Thicker films can still work on small marks, but when buyers combine heavy film, large solid coverage and a stiff bib panel, fissures often appear after 5-10 commercial washes. Cracks normally start at the edge or at a repeated fold line, then spread through the solid area.
Fabric finish is the second hidden variable. Many hospitality aprons carry stain-release, water-repellent, silicone-softened or peach-finish treatments. These finishes can lower surface energy and reduce bonding strength even when the transfer looks acceptable at final inspection. A shipment may pass visual QC, then show micro-separation and brittle cracking after 8-12 wash cycles. In that case, simply increasing press temperature from 145°C to 155°C may flatten the transfer during packing but does not reliably solve compatibility.
Artwork density and placement are often the lowest-cost correction. Large uninterrupted white blocks are less tolerant than segmented logos, outlines or linework with breathing gaps. Moving a logo 2-3 cm away from a natural bib fold or reducing solid fill by 15-25% can improve durability without changing the brand message or reopening the whole apron construction.
- A common transfer window for aprons is 140-155°C for 10-14 seconds at medium pressure, but the valid setting depends on the film system and the exact apron finish.
- Logos above 20 x 20 cm carry much higher cracking risk than marks under 8 x 8 cm, especially on aprons above 240 GSM.
- If the apron has stain-release or water-repellent finishing, request adhesion testing, 10-cycle wash testing and peel review on the bulk fabric lot before shipment.
Screen print curing failures on aprons: how under-cured ink causes cracking after 3 to 8 washes
Screen print curing failure remains one of the most common reasons for apron logo cracking after wash. The print may look acceptable at packing, pass a finger-rub check and survive a light stretch test, yet still crack after 3-8 washes because the ink never reached full cure through the entire film depth. This happens most often when a factory monitors dryer chamber temperature but does not verify actual ink-film temperature. For plastisol on aprons, the key question is whether the deposited ink consistently reached full cure, typically around 160°C, across the production run.
Heavy apron fabrics make cure control less forgiving. A black 10 oz cotton canvas apron absorbs and releases heat differently from a 7 oz natural twill or a 210 GSM poly-cotton twill. If the print shop uses one belt speed and one heater setting for all three, at least one substrate is likely to be under-cured or over-baked. Under-cured prints usually show fine overall cracking, powdering or brittle splitting after laundering. Overheated prints can become dry and inflexible, which also leads to visible failure on high-flex bib areas.
White ink on dark aprons adds another risk layer because the deposit is heavier. A thick underbase plus top white may require slower belt speed, a second pass or tighter IR profiling to reach full fusion. Water-based systems can produce a softer hand on premium café aprons, but they require tighter humidity control, stable flash conditions and adequate post-cure cooling before packing. In humid summer production, prints packed too early can pass inspection and still fail during commercial washing.
For buyers, documentation is decisive. If the supplier cannot provide lot-level records for ink system, mesh count, pass count, dryer speed and measured cure temperature, root-cause analysis becomes guesswork after a claim. On repeat apron programs, cure records should be standard production documentation, not emergency paperwork created after failure.
- Use measured ink-film temperature, not only dryer air temperature, as the acceptance standard for screen-printed aprons.
- Expect higher curing risk on dark aprons with heavy white prints, canvas above 240 GSM and humid-season water-based production.
- A practical control log should record fabric type, fabric color, ink system, mesh count, pass count, belt speed and cure reading for each lot.
Fabric weight, finish and apron construction: the substrate factors buyers should lock before logo approval
Decoration method should not be approved before the apron substrate is fixed. A 180-220 GSM poly-cotton twill, a 240-280 GSM cotton canvas and a 300-320 GSM washed canvas may look close in a tech pack, but they react very differently under the same logo method. Twill usually offers a smoother surface for transfers and screen prints, but stain-release chemistry can reduce adhesion. Heavy canvas supports embroidery and smaller durable prints well, yet its deeper crease memory punishes large rigid logos after repeated wear and washing.
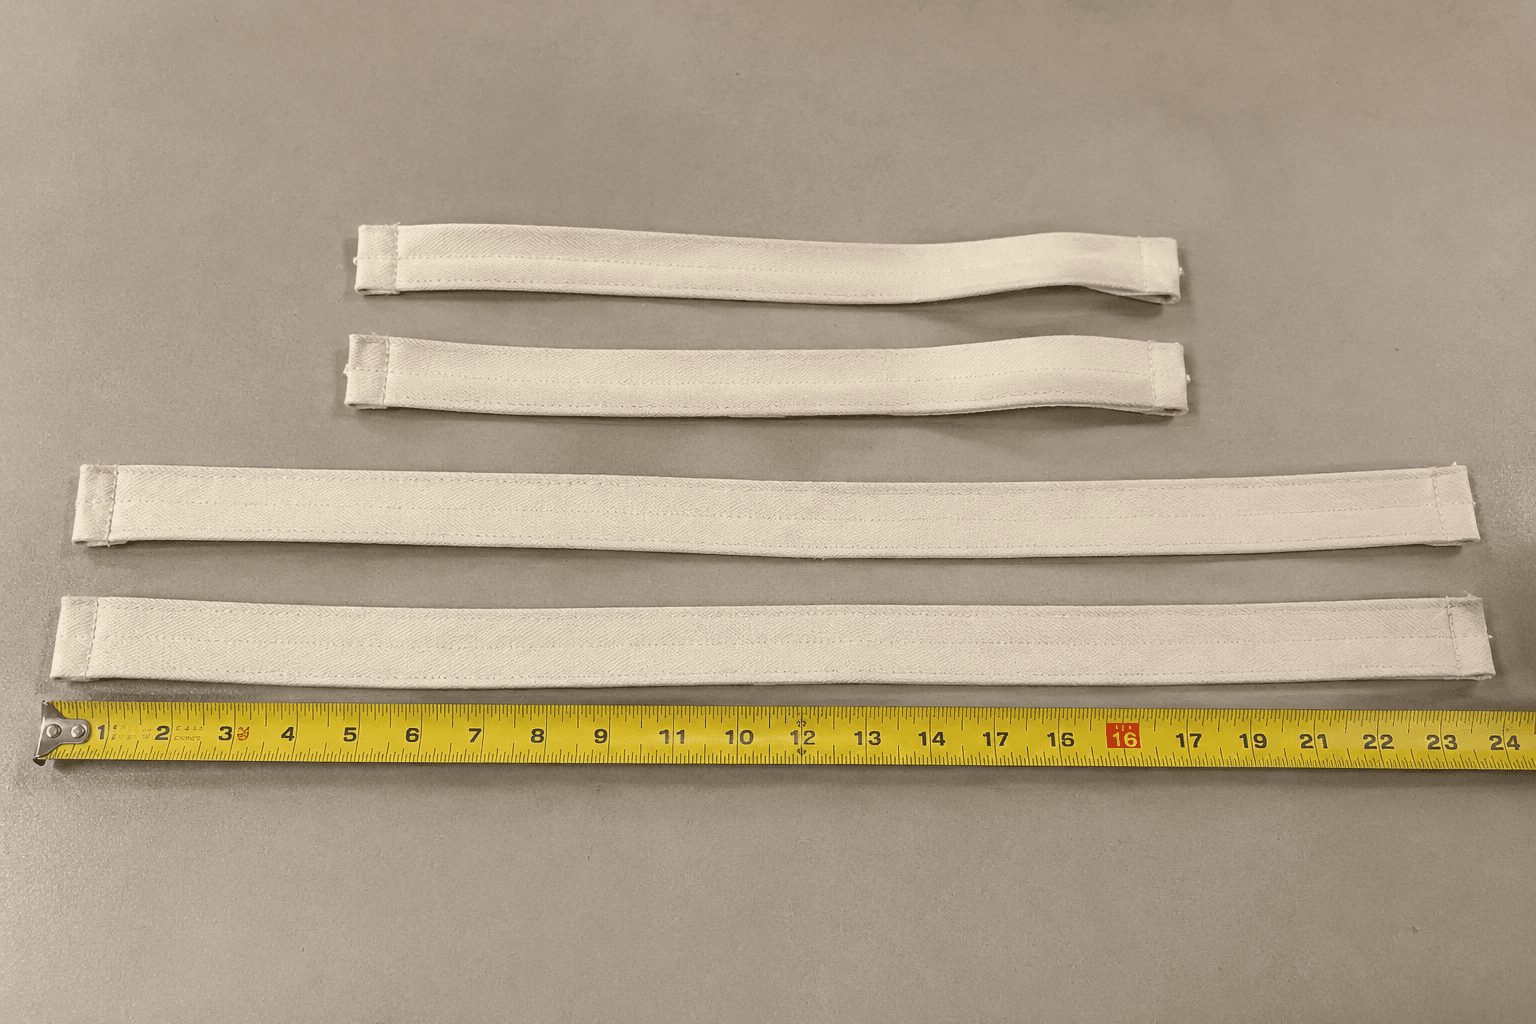
Construction details matter almost as much as fabric weight. A logo placed too close to neck-strap reinforcement can distort because bartacks and seam bulk create a local hard point. A print crossing a utility pocket mouth will bend every time the wearer reaches for a pen, towel or order pad. Divided pockets, towel loops, rivets and contrast panels all change how the apron flexes in real use. A flat artwork approval is not enough if the sewn apron creates new stress points in production.
For that reason, wash testing alone is often incomplete. A stronger validation sequence combines wear simulation with laundering. One practical method is to flex or wear 3-5 pre-production aprons for 3 working days, wash them at the specified condition, and repeat to 5, 10 and 20 cycles. That sequence helps separate failures driven by chemistry, curing and mechanical stress. On orders above 3,000 pieces, this extra validation often adds only $60-$180 and 2-4 days, which is minor compared with the cost of a rejected shipment.
- Treat 240-320 GSM canvas as a higher-risk base for large rigid transfers than 180-220 GSM twill.
- Mark pocket seams, center folds, bartacks and strap joints as restricted logo zones during artwork approval.
- Ask whether tests were run on finished aprons, cut panels or raw fabric swatches; the results are not interchangeable.
A buyer workflow to investigate apron logo cracking after wash by lot, wash count and AQL
The fastest way to resolve apron logo cracking after wash is to sort the problem with production data. Separate the symptom into film cracking, ink cracking, edge lift, peeling, color loss or substrate distortion. Then group returned aprons by PO number, style, color, fabric lot, logo batch, operator shift and confirmed wash count. If all failures come from one navy canvas lot produced in the same week, the issue is more likely process drift or finishing variation than a random defect across the whole program.
Next, compare failed pieces against retained controls. A disciplined supplier should keep sealed approval samples, unwashed retention pieces and, ideally, wash-tested references from the same production period. Re-run the failed style beside the control at 1, 5, 10 and 20 cycles, or at the customer’s claimed failure point if laundry records exist. Failure on the first wash usually points to poor adhesion or gross under-cure. Failure after 8-12 washes more often points to brittleness, marginal cure, thick film or an incompatible finish.
Inspection standards also need to be fixed before the order. For promotional aprons, many buyers accept AQL 2.5 major / 4.0 minor. For chain-uniform, hotel or central-laundry programs, AQL 1.5 major / 2.5 minor is more realistic, with agreed wash-test cracking treated as a major defect. If the PO never defined wash requirements, claim resolution becomes subjective. If the PO specified cycle count, detergent, drying method and acceptance criteria, the discussion becomes measurable.
Finally, check whether end use matched the approved care basis. If the approved standard was 40°C wash and line dry, but the aprons entered a 75°C industrial tunnel with chlorine bleach, that mismatch belongs in the claim analysis. If the buyer declared commercial laundry from the start and the supplier still approved an unsuitable logo method, the corrective action belongs on the production side.
- Request failed returns, sealed approval samples and unwashed retention pieces from the same PO whenever possible.
- Track failure timing at 1, 5, 10 and 20 cycles to separate immediate adhesion issues from delayed brittleness.
- For repeat orders, keep retention sets by style, color and logo version for at least 12 months or one full reorder cycle.
- Use written acceptance criteria such as AQL 2.5/4.0 for basic programs and AQL 1.5/2.5 for higher-risk uniform programs.
Pre-bulk prevention standards for aprons: MOQ, pilot wash testing, lead times and approved cost bands
Most logo durability disputes can be prevented during quotation and sampling if the buyer defines the apron program in operating terms. The tech pack or PO should state apron style, finished GSM or oz, composition, logo size, decoration method, wash protocol, allowed appearance change and care basis. A workable requirement looks like this: logo must withstand 20 commercial wash cycles at 60°C with standard alkaline detergent and tumble dry low; minor dulling allowed, but no visible cracking at 1 meter and no edge lift above 2 mm. That instruction is far more useful than 'washable print'.
Sampling should reflect bulk conditions. A showroom sample made by a senior operator on one press does not represent a 5,000-piece order spread across multiple shifts. For first orders, buyers should request either a 30-50 piece pilot lot or, at minimum, decoration trials on the exact bulk fabric, color and finish. In most factories, this adds 3-7 days to pre-production and roughly $40-$150 in test cost, depending on how many logo methods are compared. That is inexpensive insurance against chargebacks, airfreight replacements or launch delays.
Cost targets must align with durability expectations. At FOB $1.80-$2.40 for a basic promotional apron, there is limited room for premium decoration and extended validation. At FOB $4.50-$7.50 for a café or hospitality uniform apron, buyers can usually support softer transfers, stronger process control, side-by-side wash trials and tighter final QC. Neither price band is wrong. The risk appears when a buyer expects 50-wash commercial durability from a logo budget built for a 10-wash promotion.
Lead time should also be written into the approval path. A standard custom apron order may run 25-35 days after sample approval, but adding commercial wash validation can extend pre-production by 3-7 days. Changing decoration method after failed testing can add another 7-12 days, especially if new transfer stock, fresh screens or replacement trims are needed. Buyers should build that time into launch calendars instead of forcing late substitutions.
- Before bulk approval, lock MOQ, wash protocol and validation method together; for example, MOQ 1,000 pieces with a 50-piece pilot lot and a 20-cycle wash test.
- Confirm standard lead times in writing; wash validation often adds 3-7 days, while a decoration-method change can add 7-12 days.
- Require logo approval on the actual bulk fabric and finish, not a substitute swatch.
- Compare at least two decoration options side by side when the logo exceeds 15 x 15 cm or the apron is intended for commercial laundry.
Corrective actions after transfer or print failure on aprons: what changes the result and what only hides the problem
Once the root cause is confirmed, the correction should match the failure mode precisely. If the logo cracked because the transfer film was too rigid, the best fix is usually a softer film, reduced solid coverage or a placement shift away from the main flex line. Raising press temperature alone may flatten the logo at packing but does little to improve long-term durability. If the issue is weak adhesion on a treated apron surface, the stronger solution may be a different adhesive system, a lower-finish fabric option or a switch from transfer to screen print or embroidery for that style.
If the diagnosis is curing failure, the remedy is process control rather than cosmetic rework. That may mean slower conveyor speed, a verified 160°C ink-film target for plastisol, adjusted flash settings, lower deposit thickness or a revised production window for humid conditions. Buyers should ask the supplier to document what changed, whether MOQ is affected and whether the correction alters cost or lead time.
Small corrective actions such as moving artwork, reducing solid fill or revising care-label wording can often be implemented within 1-3 days with little or no unit-cost increase. Process changes such as new transfer sourcing, revised adhesive chemistry or expanded wash validation often add $0.03-$0.12 per piece and 3-7 days. Larger changes such as switching decoration method or changing base fabric may add $0.20-$0.80 per piece and 7-14 days, depending on MOQ, fabric availability and whether fresh lab dips or bulk approvals are needed.
The most reliable apron suppliers are specific about these trade-offs. They do not claim one logo method fits every apron program. They state what can realistically pass 10 washes, 30 washes or 50 washes on a given fabric, what AQL they can hold, and what the decision adds in cents per piece and production days. That level of detail prevents repeat failures instead of treating each complaint as an isolated event.
- Low-impact corrections include moving the logo 2-4 cm, reducing solid coverage and tightening care-label wording.
- Medium-impact corrections include switching adhesive system, revising press or cure settings and adding lot-based wash validation.
- Higher-impact corrections include changing decoration method, changing fabric finish or extending lead time by 7-14 days for retesting and pilot production.